

The writing surface
The centre column is where you write. It reads like a film script, character cues, dialogue, and stage directions, and you type into it much like a good word processor. A lot of what makes it fast stays out of sight until you want it; this page walks through the whole thing.
Bubbles, cues, and beats
Section titled “Bubbles, cues, and beats”A run of dialogue and narration that plays together is a snippet, drawn as a soft rounded card, a “bubble”. Quiet space sits between bubbles, so the shape of a scene reads at a glance without the page turning into boxes and lines.
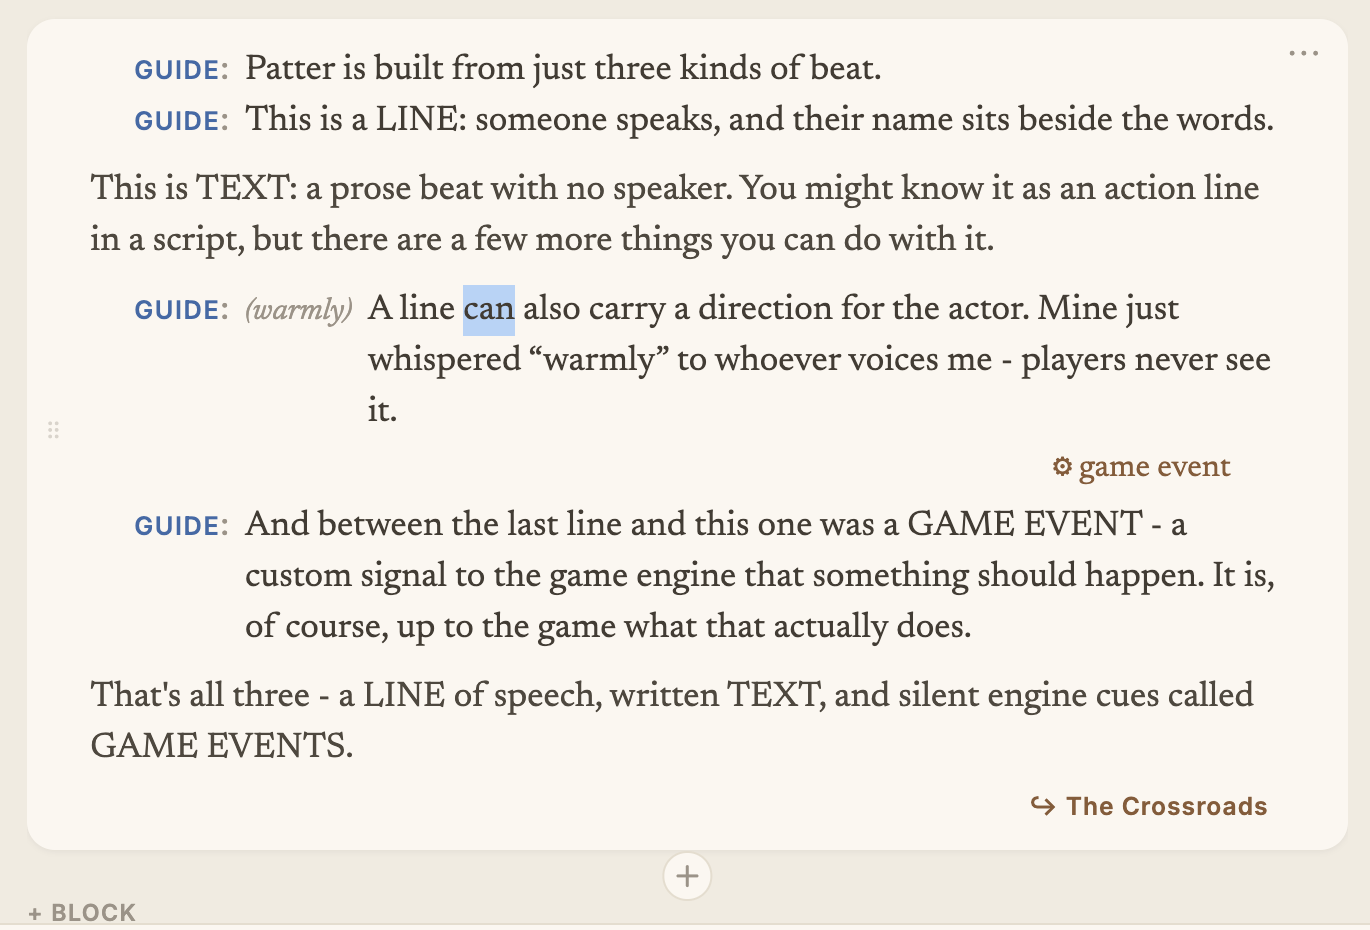
GUIDE cue beside the words), a text beat (prose with no speaker), a line carrying an inline (warmly) direction, and a silent ⚙ game event. The ↪ The Crossroads chip is a jump; the ⠿ grip reorders the bubble and ⋯ opens its action menu.Inside a bubble are beats, and there are only three kinds:
- a line: someone speaks, with their name beside the words;
- a text beat: narration or description, with no speaker;
- a game event: a silent cue to your game (play a sound, move the camera) that the player never sees.
A character’s name is a coloured tag, not something you retype each time. Each
character keeps their own colour, so you can see who’s speaking as you skim. An empty
line shows a faint <character>: until you name a speaker.
Naming a speaker
Section titled “Naming a speaker”Click or arrow into a name and a small picker opens:
- type to filter your cast;
- ↑ / ↓ to move through the matches;
- Enter or Tab to accept the highlighted name;
+ Add "<name>"adds someone new;- Esc (or a click away) closes it.
Anyone you name is added to the cast for you, so there’s no cast list to set up first.
Typing: lines, narration, and directions
Section titled “Typing: lines, narration, and directions”Most of writing is just typing. These keys cover the rest:
| Key | What it does |
|---|---|
| Enter | A new line in the same bubble |
| Shift-Enter | Start a new bubble |
| Tab | Turn a plain line into dialogue (and open the name picker); also finishes a name or a (direction) |
⌘T / Alt-T | Switch the current line between dialogue and narration, keeping the words |
| Space at the start of a line | Turn it into plain narration |
( … ) | Add an inline (direction) to a spoken line |
⌘B / ⌘I | Bold / italic the selected words |
You rarely need to memorise these: the hint bar along the bottom always shows the few keys that matter right where your cursor is.
A direction is a note to the performer that the player never hears, like (warmly)
or (under her breath). Write it in round brackets inside a spoken line. It isn’t part
of the spoken words, so it’s never translated or voiced; it’s just guidance for whoever
reads the line.
Bold and italic are available when formatting is turned on for the project (Project Settings ▸ General); names and directions always stay plain. Your styling travels with the words into every language and on into your game, which draws it in its own style.
A direction is not the same as a closed caption. An inline caption uses square
brackets, [sighs], and is shown to the player unless they switch captions off; a
(direction) is only ever for the performer and the player never sees it. That’s a
writer’s call, covered in
Closed captions ▸ Authoring.
Pasting a block of dialogue lays each line out as its own beat automatically.
Moving around
Section titled “Moving around”Beyond the usual arrows and clicks, two things are worth knowing:
- The left and right arrows walk through a line a piece at a time, name, direction, words, and carry on to the next line at the end.
- Undo and redo (
⌘Z/⇧⌘Z) cover everything, including structural changes like splitting or reordering a bubble, so you can always step back cleanly.
Building structure as you type
Section titled “Building structure as you type”You rarely need a menu to add something:
- A ”+” in the gap under a bubble adds another bubble.
- An empty bubble shows a faint ”+”; click it to start writing.
- On a blank line,
/opens a quick menu: add a game event or a jump, split here, or follow on with a snippet, a branch, a choice, or one of the sequence presets (once each, cycle, or shuffle).
The full set of structural tools, choices, selectors, jumps, and the ⋯ menu, lives in Structure & branching.
Selecting and moving whole chunks
Section titled “Selecting and moving whole chunks”You can grab whole bubbles and groups, one or many:
- Shift-click to select a range.
- ⌘ / Ctrl-click to add or remove one at a time (so you can pick, say, the first, second, and fourth).
- Click the empty background to clear the selection.
- With something selected, ⌫ deletes it (with a quick confirm), and right-click ▸ Wrap in groups it.
To reorder, grab the ⠿ grip on the left and drag a bubble, group, or block; the page opens a gap to show where it will land, and Esc cancels mid-drag. Dragging an option out of a choice turns it back into a plain bubble.
Sections and titles
Section titled “Sections and titles”- The scene title at the top is editable in place. Right-click it for a scene note, or to set the writing status of the whole scene at once.
- Each block is a section with its own heading (which also names the place jumps land). ”+ block” adds another, the grip reorders, and right-click adds a note.
Once the scene title scrolls away, the top bar keeps showing the scene name, so you always know where you are.
MIT-licensed open source · Made by Ian Thomas · patterkit.com